
November 29, 2008
#49 - Michele Inspects the Progress
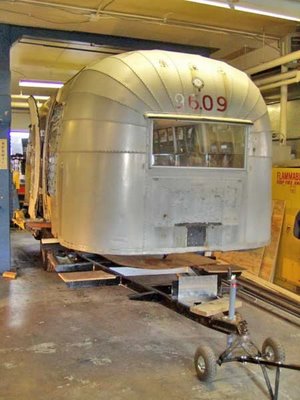
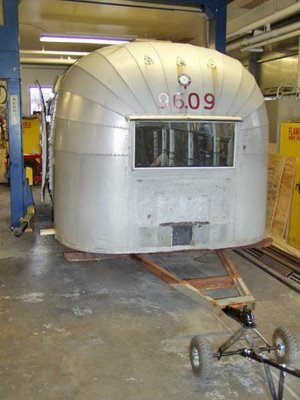
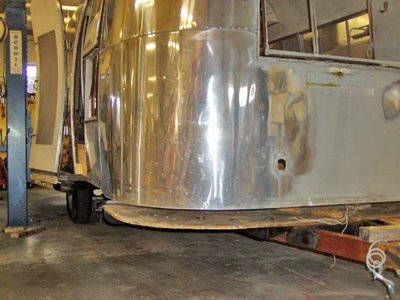
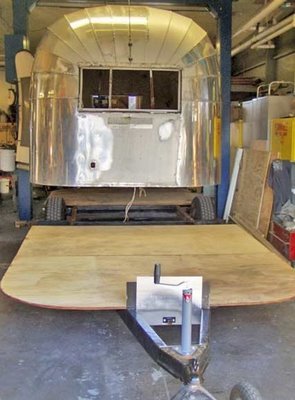
Michele and I took a trip to Plattsburgh Wednesday so she could see where the project sits and we could start to get serious about our floorplan. It was great that she finally got to see the trailer in person. This project has been going on a long time and this is her first look at it.

October 03, 2008
#48 - Window Frame Polishing
After a lot of trial and error, I've come up with an efficient process for removing the heavy oxidation and corrosion from the window frames and creating a near-mirror finish. My method isn't cheap. It requires an investment in consumable abrasives, pads and polishing compounds. I haven't added it up, but I know I've spent more than $200 in consumables just to polish the 9 windows' frames. That's in addition to an air compressor and an angle grinder. After trying it a few different ways, I'm convinced the best tool for the job is a pneumatic 1/4" right angle die grinder. Get a cheap one for under $30 on eBay.
Here are the steps on the aluminum frames:
1. You can waste a lot of time trying to get the heavy oxidation off your windows with the wrong tools, abrasives and polishes. You have to overcome your fear and be aggressive. This isn't the trailer's ALCLAD skin so you can use tools you'd never dream of using on the rest of the trailer.
Use 80 grit (yellow) 3M Bristle Discs in the 2" size on your grinder. Grind all surfaces that will be visible after installation. Bristle Discs are going to scratch the hell out of your frames. But they're fast and they get all the oxidation and corrosion off that you're going to get off. You might want to buy a few 1" bristle discs, too, for tight spots. Do NOT use the 3M radial bristle discs. They gouge.


2. After you've scratched all the severe oxidation and corrosion off, you need to fix the scratches. Get some 320 grit and 400 grit wet sandpapers and hand sand everything you just took the grinder to. You have to go over it a lot to get out all the swirls from the bristle discs. Don't hurry this step. Clean frequently. Make sure the swirls are gone. Now instead of swirls, you will be left with finer scratches going the length of the frames. The second photo below shows the "before and after" of the hand sanding.


3. From here on, you'll be back to the power tools. Place a cotton 1.5" cylindrical or goblet-shaped buff in your grinder. Use Nuvite F9 polish and slowly polish everything that has been sanded.

4. Use a different buff to do it again with Nuvite C polish.
5. At this point it looks pretty good. If you would like, do it again with Nuvite S and a third buff, but I'd recommend waiting until it is installed back in the trailer before worrying about Grade S.
A note about what to polish and what not to polish... While you want to get all the oxidation and corrosion off all the parts, some parts of the frame don't need to be polished through all 5 steps above. Obviously the exterior of the front frame should be a mirror. But the backs of the back frames will basically not show at all and can be left in a clean but unpolished state.
October 01, 2008
#47 - Proper Window Restoration
To begin a window restoration, the window needs to be disassembled. Front frame and back frame are separated at the hinge. Then the vertical center channels are removed from the frames. Take care with the extruded aluminum front frame channels. The 4 rusty mild steel screws that hold them in place easily break off inside the channels.
After the channels are off, the old screen is removed from the back frame and the glass is removed from the front frame. To get the glass out, you'll be removing lots of little rusty fasteners that secure the L-shaped aluminum glass holders behind the glass. Throw the screws and nuts away. You can get new screws and tension nuts from Vintage Trailer Supply.
All the dismantling is necessary so you can de-rust and repaint the steel back frame channels. You're also going to replace the old screen material, get new glass, and then spend hours and hours removing corrosion and polishing the aluminum frames. The photo below shows a pile of back frames. The first two frames show what they look like when the oxidation and corrosion have been mostly removed (but before detailing). The rest show the extremely heavy oxidation and significant corrosion you'll encounter.

If you've polished an Airstream, you know about oxidation. It's not quick to remove, but on a trailer skin it isn't really that big a deal because the oxidation is generally even and rather thin. You can read my article on polishing an Airstream if you don't know the basics.
Polishing 53-year old window frames is nothing like polishing an Airstream. Repeat: nothing. Rub your finger across the back frame's sill. Feel how rough that is?. That's extreme oxidation and corrosion. The oxidation builds up into little craggy mountains of oxide. It cannot be polished off with aluminum polish. Don't even try. You're going to be grinding it or sanding it off. After you get it off, you're going to see little pits and valleys in the aluminum. That's corrosion and you can't entirely fix it. You can minimize it by continuing to grind and sand, but some of it is going to be there when you're finished. Fortunately, the only place the corrosion will be especially noticeable after you reassemble everything is in that exterior sill area. And that's not visible when the windows are closed.
In my next post I'll detail how to remove the severe oxidation.
September 21, 2008
#46 - Back in the Saddle
My daughter is now 17 months old. My excuse has grown old.
With a wet New England winter approaching (again), my trailer must have its windows soon. The plastic sheets taped over the rough openings in the trailer are tattered. They won't last another winter.
Inspired by cold weather, I retrieved the large box of windows in my basement where I stashed them nearly two years ago.

There are 6 large windows (4 make up the Caravanner's trademark "Panoram" on the street side) and 3 smaller windows on the curb side. All 9 windows are Hehr Standard windows with gear type operators, as was the norm on 1956 Airstreams.
Hehr (brand name) Standard (model name) windows were the most commonly used windows in the vintage trailer world for all types of trailers built in the 1950s and well into the 1960s. They were used on Airstreams starting in 1952 and used as late as 1960 on a few models. They were used by canned ham trailer makers throughout the 1960s. They are now obsolete and the only parts available are those we've had reproduced.
Hehr Standard windows are awning style windows with a hinge on top. They have two primary parts: the front frame and the back frame. The front frame is the part that swings and holds the glass. The back frame is the part that is stationary and mounted in the wall of the trailer. It holds the insect screen.
After 50 years of neglect, my windows were in desperate need of restoration. Rusty steel fasteners, latches, operators and channels all needed replacing or de-rusting. The aluminum was, at best, heavily oxidized. At worst, it was heavily corroded. The glass was scratched. The vinyl rubber gaskets dried and shrunk. The galvanized steel insect screen was heavily corroded to the point of reducing visibility.
The only way to restore a Standard window correctly is to remove it entirely from the trailer body. That's because you have to do a lot of work to the back frame...including replacing the back frame gasket that is mounted by slipping part of the gasket between the back frame and the trailer skin with the rivets holding the back frame to the trailer going through the gasket! (There's an early 1950s variation on the window that is mounted slightly differently.)
In subsequent posts, I'll talk in detail about how to properly and completely restore the back frames and the front frames.
November 11, 2007
#45 - Why Aistream Restorations Are So Slow
I've noticed that many, many Airstream restorations stretch on for years. For most people, a lack of money and time are the two biggest culprits. Here's my excuse.

Click on her picture and you'll see my point. Her name is Sadie and she's now 7 months old. You'll notice my last post is about the same age.
I'm supposed to be polishing window frames so they can be reinstalled in the rough openings in my trailer walls. It's hard to justify time in a garage with an air compressor when I can be bouncing Sadie on my knee. But I'm motivated by camping next summer with my wife Michele and Sadie, so I expect to get back in the saddle soon.
May 19, 2007
#44 - How to Make an Astradome
With new Fan-Tastic fans installed in 2 out of 3 of my 14" roof vents, I decided to get creative with the third opening.
Starting in either 1957 or 1958, Airstream offered an extra large unpowered roof vent called an "Astradome." It was the standard 14" wide, but 25" long. It's a neat 50s Airstream feature that I decided to add to my trailer.

The hardware is all the same as a standard 14" square opening, so all I needed to do was stretch the opening and mount a reproduction lid. The only thing left undone is to make a long screen for it.

Now my living room area will have a large opening in the ceiling and my galley and rear bedroom will have powered fans.

April 11, 2007
#43 - New Roof Vents
My Caravanner has 3 roof vents. Originally, all three were standard 14"x14" aluminum Hehr vents. They were in poor condition, with missing and seized cranks and dented and missing lids. The first photo shows a giant Tupperware lid being used as a temporary lid on one of them.

Between my two trailers and parts I've accumulated on eBay and elsewhere, I have plenty of good spare parts to make all 3 open and close almost like new again...the only problem was the old fans in them. Even if I could get those working, the old Hehr aluminum blade fans were just too noisy and inefficient.
I decided that I would like to have 2 of the 3 vents outfitted with modern powered fans. By far, the best powered fans on the market today are made by Fan-Tastic Vent. Recently, my company Vintage Trailer Supply started selling gray Fantastic units with gray flat lids. I worked with Fantastic to develop this special style unit specifically for vintage Airstreams. To demonstrate how great they look on vintage trailers, I put them in the rear two locations on my trailer.


March 21, 2007
#42 - Scary Old Wiring
Once the insulation is out, we really got a good look at the ratty old wiring circa 1956. Instead of using boxes at junctions and around outlets, they simply wrapped wire connections with electrical tape. The black stuff on the aluminum is seam and rivet sealant. The masking tape was used to hold the wiring in place. The writings in black Sharpie are new notes to remember where everything goes.


#41 - Removing the Remaining Interior
Chris is removing the remaining inside walls by simply drilling out the rivets. The bottom wall segments were removed earlier so the shell could be attached to the floor, but we waited on the upper segments to give the shell structural stability until after the shell was firmly attached to the floor.


March 05, 2007
#40 - Buried in Snow
Jaime Martorano sent me this photo today showing his and my trailers somewhat buried in the snows we've been getting here in the Northeast. I will use this as this week's excuse for no progress on my Airstream project. My trailer is the second one. Jaime's is the third.


January 09, 2007
#39 - I Want A Rear Hatch
The photo below shows the rear panel on my #2 shell (the good shell) all taped up for the winter with aluminum foil tape. You can see that the panel below the window is just a plain panel with no storage compartment access door. With a rear bedroom trailer, a rear storage compartment seems like a must-have to get access to all that great storage space. You will also notice there's a round vent in the panel. That vent may have been for the bathroom, but it is no longer necessary.

The next photo shows the rear panel on my #1 shell (the junker shell). The panel is in great condition and even has a hatch with a good door and drip cap. The rusty handle is bad, but that part is on my list of parts to find and add to the inventory at Vintage Trailer Supply.

Are you thinking what I'm thinking? Apparently Santo is. What an easy way to add a hatch. Just a few rivets and it will be finished. Gotta love having a parts trailer! (I know Santo looks miffed, but that's just because Colin is taking his photo and micro-managing him at the same time!)

The demise of the #1 shell continues, but now I'll have a rear hatch and a perfectly good panel on my trailer!

Here's the hatch being installed on my good shell. The framing in the wall will need to be modified to fit the opening. Notice that using buck rivets is a two-person job, with one person inside holding the bucking bar behind each rivet as it is installed. If the inside wall was already in place, buck rivets couldn't be used. That's why Olympic shave head blind rivets were invented.

December 23, 2006
#38 - Pardon the Interruption
I'm too busy right now to do much on my Caravanner project. Big changes are happening at my company, Vintage Trailer Supply. In January, we're moving to a new facility, dramatically upgrading our technology (again), adding even more new items, and then hiring more help. Although I'm excited to grow and improve customer service for our super-loyal customers, the investments keep money and time very tight.
In January, I hope to spend many hours polishing and rebuilding all my window frames. All the windows have been removed from the trailer. They were riveted in at the factory, so all the rivets--hundreds of them--had to be drilled out. The trailer is left with rough openings where the windows were. They're covered with plastic for the winter. The windows are in my basement waiting for me to get to work.
In January, I hope to spend many hours polishing and rebuilding all my window frames. All the windows have been removed from the trailer. They were riveted in at the factory, so all the rivets--hundreds of them--had to be drilled out. The trailer is left with rough openings where the windows were. They're covered with plastic for the winter. The windows are in my basement waiting for me to get to work.
December 06, 2006
#37 - Finishing the Floor
Today's project was to finish installing the floor and then securely attach the shell to the floor.
For an Airstream to be structurally sound, the floor must be solid. But I'm not talking about the part of the floor you walk on. I'm talking about the part of the floor under the walls.
When an Airstream is built, the plywood is installed first and the shell is put on top. So when the plywood around the edges softens and disintegrates, it leaves a 5/8" gap between the bottom of the wall and the top of the chassis! To make matters worse, Wally's crews usually screwed the bottom of the wall into the plywood, but not all the way through the plywood and then into the chassis. So if your floor is soft under the walls, you have NOTHING holding the shell to the chassis in the area of the weak floor!
The shell must be bolted or screwed through solid floor and into the chassis. That's why floor repair is so hard on an Airstream...and is so often done insufficiently. Floor repair shortcuts that put new pieces of floor up to the wall, but not under it, may give you a firm floor, but they will not fix the underlying problem of a shell and chassis that are not fully secured.

Before the plywood and chassis are fastened securely together, the chassis will have a tendency to sag at the rear end. Working on a solid level surface and using temporary jacks to hold everything straight is essential until the floor is fully fastened down. Notice, also, the extra long chassis rails. Caravanner #1 came with a 1960s-style trunk bumper for the sewer hose rather than a simple 1950s bumper. I'm going to replicate that feature.

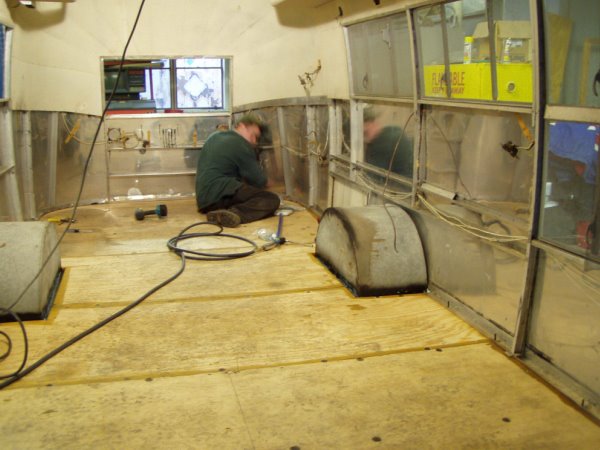
The photo above shows the new plywood floor spanning the restored chassis. For extra stability, construction adhesive is used where the floor touches the chassis. Back in the day, Wally's crews layed fiberglass insulation across the chassis before the plywood was layed. We aren't doing it that way. We'll be insulating from below before the belly pan is closed up.

Notice the odd plywood seam pattern above. The edges of each piece of plywood need to all end up on frame members so they are supported. My chassis is modified to create a trapezoidal spare tire storage area under the floor. You can see it in post #25. This is also a good shot of how all plywood edges (and all undersides) are treated with wood preservative.

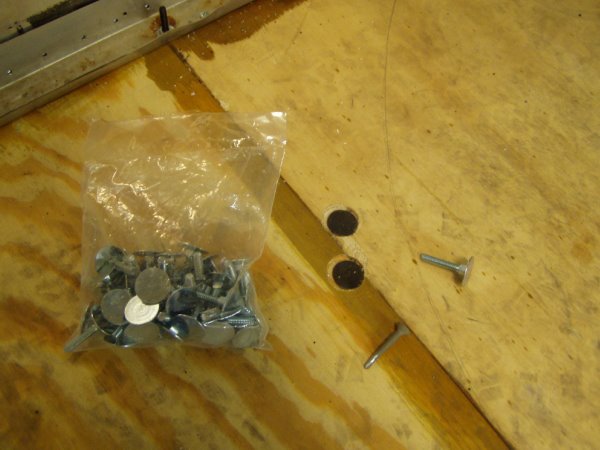
The fasteners of choice for the floor are elevator bolts and countersunk self-tapping machine screws. The elevator bolts are great because their wide flat heads are easy to countersink and could never pull through the plywood. They're secured with a hex nut underneath. The special self-tapping machine screws are almost as good. They have threads like bolts. They're used only where it would be impossible to reach the bottom end of a bolt to put on a hex nut. With the screws, the frame member is tapped so it acts like a nut and holds great. In a case like his, they aren't used much. But if you are doing a floor repair without removing the belly pan, they're your best friend.

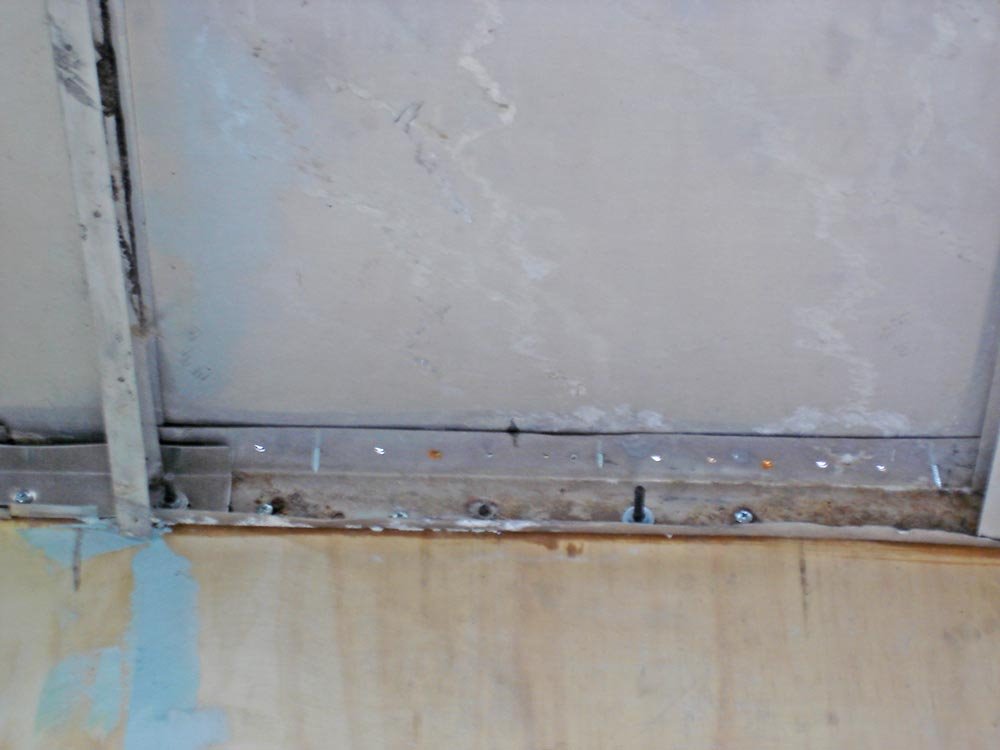
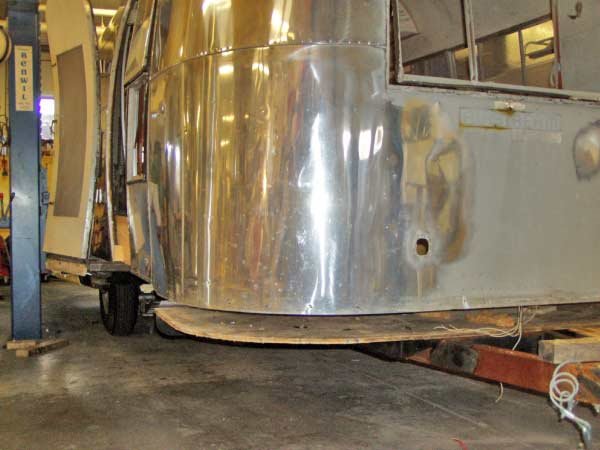
The shell has a U-channel inside the bottom edge of the wall all the way around. It's what secures the bottoms of the inner and outer skins of the trailer. Remove the lower segments of inner skin to get access to the U-channel. Screws and bolts are used to hold the U-channel to the floor and chassis. Here you can see the nuts on the ends of elevator bolts that were inserted through outriggers from below and then up through the channel. Sometimes, they go the other way. It doesn't much matter what fasteners you use here since they are hidden, but they should hold tight to the chassis as much as possible.
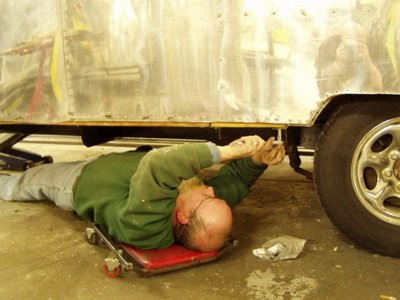
It can be tricky to get the nut on the bolt underneath. It's a two-person job. Above, Joe holds the socket wrench while Chris is working the top side.
For an Airstream to be structurally sound, the floor must be solid. But I'm not talking about the part of the floor you walk on. I'm talking about the part of the floor under the walls.
When an Airstream is built, the plywood is installed first and the shell is put on top. So when the plywood around the edges softens and disintegrates, it leaves a 5/8" gap between the bottom of the wall and the top of the chassis! To make matters worse, Wally's crews usually screwed the bottom of the wall into the plywood, but not all the way through the plywood and then into the chassis. So if your floor is soft under the walls, you have NOTHING holding the shell to the chassis in the area of the weak floor!
The shell must be bolted or screwed through solid floor and into the chassis. That's why floor repair is so hard on an Airstream...and is so often done insufficiently. Floor repair shortcuts that put new pieces of floor up to the wall, but not under it, may give you a firm floor, but they will not fix the underlying problem of a shell and chassis that are not fully secured.

Before the plywood and chassis are fastened securely together, the chassis will have a tendency to sag at the rear end. Working on a solid level surface and using temporary jacks to hold everything straight is essential until the floor is fully fastened down. Notice, also, the extra long chassis rails. Caravanner #1 came with a 1960s-style trunk bumper for the sewer hose rather than a simple 1950s bumper. I'm going to replicate that feature.
The photo above shows the new plywood floor spanning the restored chassis. For extra stability, construction adhesive is used where the floor touches the chassis. Back in the day, Wally's crews layed fiberglass insulation across the chassis before the plywood was layed. We aren't doing it that way. We'll be insulating from below before the belly pan is closed up.

Notice the odd plywood seam pattern above. The edges of each piece of plywood need to all end up on frame members so they are supported. My chassis is modified to create a trapezoidal spare tire storage area under the floor. You can see it in post #25. This is also a good shot of how all plywood edges (and all undersides) are treated with wood preservative.
The fasteners of choice for the floor are elevator bolts and countersunk self-tapping machine screws. The elevator bolts are great because their wide flat heads are easy to countersink and could never pull through the plywood. They're secured with a hex nut underneath. The special self-tapping machine screws are almost as good. They have threads like bolts. They're used only where it would be impossible to reach the bottom end of a bolt to put on a hex nut. With the screws, the frame member is tapped so it acts like a nut and holds great. In a case like his, they aren't used much. But if you are doing a floor repair without removing the belly pan, they're your best friend.
The shell has a U-channel inside the bottom edge of the wall all the way around. It's what secures the bottoms of the inner and outer skins of the trailer. Remove the lower segments of inner skin to get access to the U-channel. Screws and bolts are used to hold the U-channel to the floor and chassis. Here you can see the nuts on the ends of elevator bolts that were inserted through outriggers from below and then up through the channel. Sometimes, they go the other way. It doesn't much matter what fasteners you use here since they are hidden, but they should hold tight to the chassis as much as possible.

It can be tricky to get the nut on the bolt underneath. It's a two-person job. Above, Joe holds the socket wrench while Chris is working the top side.
December 04, 2006
#36 - Swapping Shells
Here's something you'll probably never see again: Today, Colin's crew swapped the shells and chassis from two identical vintage Airstreams.
The ordeal was necessary because my #1 1956 Caravanner has a beautifully restored and customized chassis and my #2 1956 Caravanner has a much better shell. By marrying the #1 chassis and #2 shell, we'll get the best of both trailers. The photos below will show the general steps they followed.
First, Caravanner #1 was brought inside the shop...
 The shell of #1 is separated from its chassis and lifted high enough to clear the wheel wells.
 The good #1 chassis is pulled out from under its shell and set aside for the time being.
 Next, a spare old rusty chassis is pushed underneath. This one just happens to have belonged to movie star Matthew McConaughey. Colin's crew is working on Matthew's trailer simultaneously, and they built him a brand new chassis rather than restoring his original.
 Shell #1 is set down on Matthew's old chassis and minimally fastened so it doesn't fall off. They will be towed off to the back part of the lot where they will be used for parts for my trailer and others.
Now Caravanner #2 is brought inside...
 The #2 shell and chassis are separated.
 With the shell up in the air, the #2 chassis is pulled out from underneath. That #2 chassis is set aside for now. I will try to find a loving home for it since it is in restorable condition.
 Here, my restored chassis from #1 is brought back in the shop and pushed underneath the #2 shell.
 Finally, the #2 shell is carefully lowered down on the #1 chassis. Fortunately, it fits! With each 50s Airstreams being somewhat unique in construction, we couldn't be 100% sure until the moment of completion.
The next step will be to finish installing the plywood floor and then secure the #2 shell to it's "new" chassis.
The ordeal was necessary because my #1 1956 Caravanner has a beautifully restored and customized chassis and my #2 1956 Caravanner has a much better shell. By marrying the #1 chassis and #2 shell, we'll get the best of both trailers. The photos below will show the general steps they followed.
First, Caravanner #1 was brought inside the shop...
 The shell of #1 is separated from its chassis and lifted high enough to clear the wheel wells.
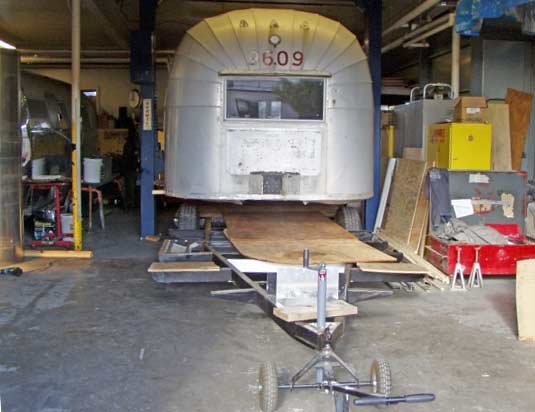 The good #1 chassis is pulled out from under its shell and set aside for the time being.
 Next, a spare old rusty chassis is pushed underneath. This one just happens to have belonged to movie star Matthew McConaughey. Colin's crew is working on Matthew's trailer simultaneously, and they built him a brand new chassis rather than restoring his original.
 Shell #1 is set down on Matthew's old chassis and minimally fastened so it doesn't fall off. They will be towed off to the back part of the lot where they will be used for parts for my trailer and others.
Now Caravanner #2 is brought inside...
 The #2 shell and chassis are separated.
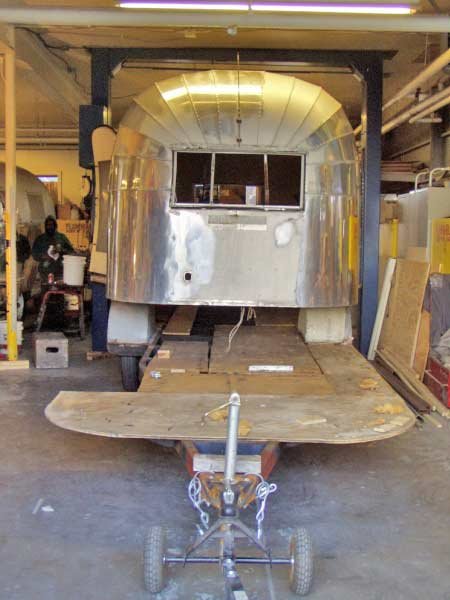 With the shell up in the air, the #2 chassis is pulled out from underneath. That #2 chassis is set aside for now. I will try to find a loving home for it since it is in restorable condition.
 Here, my restored chassis from #1 is brought back in the shop and pushed underneath the #2 shell.
 Finally, the #2 shell is carefully lowered down on the #1 chassis. Fortunately, it fits! With each 50s Airstreams being somewhat unique in construction, we couldn't be 100% sure until the moment of completion.
The next step will be to finish installing the plywood floor and then secure the #2 shell to it's "new" chassis.
December 03, 2006
#35 - Mexican Caravan
My #1 Caravanner came with a wonderful bumpersticker on its rusty bumper. It was a very old sticker from a campground in Oaxaca, Mexico.
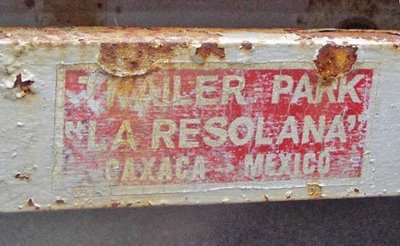
That tantalizing peek into my trailer's history is especially interesting since Wally Byam Caravans led a big caravan to Mexico--including Oaxaca--in 1956.

That tantalizing peek into my trailer's history is especially interesting since Wally Byam Caravans led a big caravan to Mexico--including Oaxaca--in 1956.
I wish I knew more of the story.
December 01, 2006
#34 - Wally Byam's Style
Vintage Airstream owners keep Wally Byam's legacy alive. But what is it that matters about Wally, now decades after his death? Someday, I'd like to read or write a good biography of Wally. Perhaps we know less than half the story.
No matter who Wally really was, we do know he was a master at public relations and marketing. He reminds me a little of Richard Branson of Virgin Inc. Like Sir Richard, Wally used his personality and his own lifestyle to promote his products and create a buzz and cool-factor that translated into sales of his travel trailers. But even more than an ingenious marketer, Wally seems to have been authentically committed to promoting a life of travel and adventure for all Americans. In his books, he pushes his readers to get out of the rocking chair and travel.
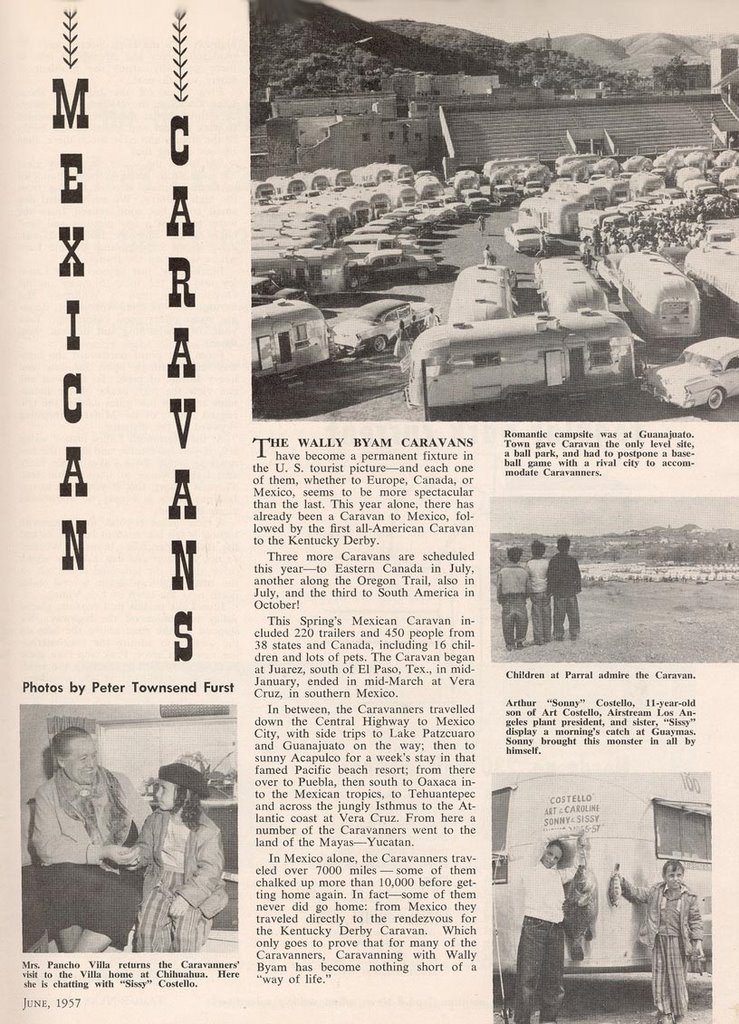
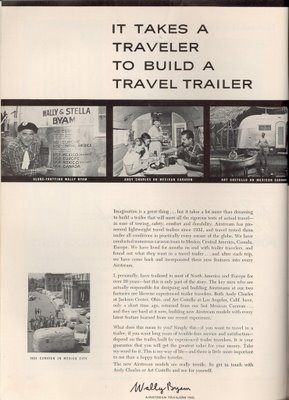
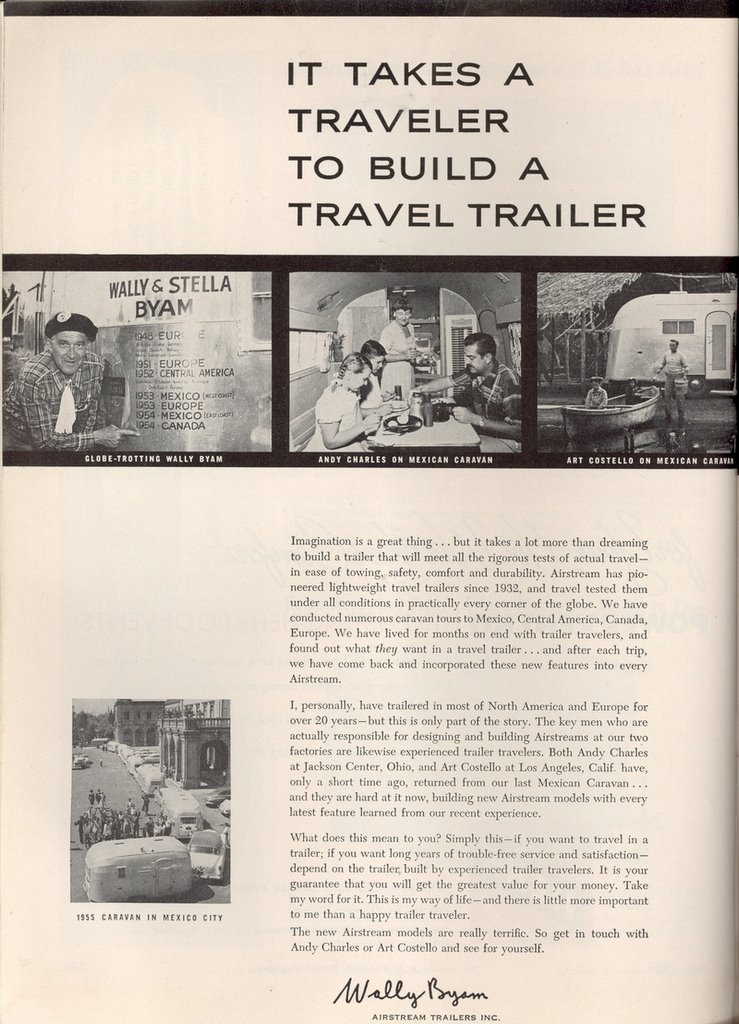
Here's a great ad from right around 1956 that demonstrates the way he wove together marketing and adventure. You might have to click on it more than once to make it the big enough to read.
No matter who Wally really was, we do know he was a master at public relations and marketing. He reminds me a little of Richard Branson of Virgin Inc. Like Sir Richard, Wally used his personality and his own lifestyle to promote his products and create a buzz and cool-factor that translated into sales of his travel trailers. But even more than an ingenious marketer, Wally seems to have been authentically committed to promoting a life of travel and adventure for all Americans. In his books, he pushes his readers to get out of the rocking chair and travel.
Here's a great ad from right around 1956 that demonstrates the way he wove together marketing and adventure. You might have to click on it more than once to make it the big enough to read.
November 22, 2006
#33 - 1956 Original Features
I found a 1957 Caravanner brochure on the VAC site. I haven't found a 1956 Caravanner brochure, but the two models were similar. If anyone finds a '56 brochure, let me know.
Here's the most humorous section of the sales pitch for this trailer. Remember the shell is only 19' long:
"Bold, adventurous trailering awaits the young at heart in this excitingly new lightweight Airstream crusing model."Here are the standard features of the Caravanner. At this point, I'm planning to modify or remove features in red:
- Overall length - 22'
- Body length - 19'
- Overall weight - 2800 lbs.
- Hitch weight - 270 lbs.
- Choice of 3 interior wall colors.
- Comfortable divan with arms, converts to double bed. (I'm doing a dinette in front that converts to a bed.)
- 48" x 76" Airloom double bed. (I'm 78" tall.)
- Marine type flushing toilet, shower and vanity type lavatory.
- Electric water heater. (I'm going with gas.)
- Five foot drop-leaf table. (Our dinette will serve this purpose.)
- Butane radiant heater.
- Combination 5.8 cu ft ice-electric refrigerator with freezer. (The trailer came with the gas option below.)
- Double basin sink with swing faucet.
- Butane range, 3-burner, oven, broiler.
- 60" of Formica galley tops in kitchen.
- 116" of roof lockers, 32" wardrobe.
- Closet for household appliances.
- One 6 or 12 volt battery dome light. (I'll add a few.)
- Airstream's "Airliner" curtains. (I don't know what these looked like. Maybe I can recreate them.)
- Linoleum tiled floors. (Real Linoleum sheet instead of tiles.)
- 9 crank operated windows.
- 3 roof vents, power fan in center vent.
- Warp-proof hollow core cabinet doors.
- Touch control built-in step.
- Radio antenna
- Butane tank
- Imported "Sta-Closed" closet catches.
- Porch light.
- 12' awning rail.
- Waterproof 110 volt electrical outlet.
- Escape type rear window.
- Fiberglass insulation.
- Trunk compartment.
- Steel bumper.
- Shock absorbers.
- Electric brakes.
- Truck wheels 7.00x15 six-ply tires.
- Pressurized water system.
- 3.9 cu ft gas refrigerator.
- Septic tank for toilet.
- Gas water heater.
- Puncture proof tubes. (I'll be using tubeless.)
- 8-ply tires.
- Two butane tanks.
"...an extra roomy shower, a unique concealed wash bowl that converts into an attractive mirrored vanity and a hot water heater."If you've ever seen the convertible vanity, you'll agree it's very slick.
Here's the most humorous section of the sales pitch for this trailer. Remember the shell is only 19' long:
"This wide open, spacious one room trailer is transformed into a two room apartment by simple use of an ingenious folding door. This also provides privacy for bedroom, toilet, lavatory and shower in their rear locations while the front living room is in use."It then mentions my absolute favorite part of Caravanners:
"The 20 sq ft of area in the giant 'Panoram' window presents a kaleidoscopic view of all of outdoors, while flooding the living room with daylight and ventilation."
November 19, 2006
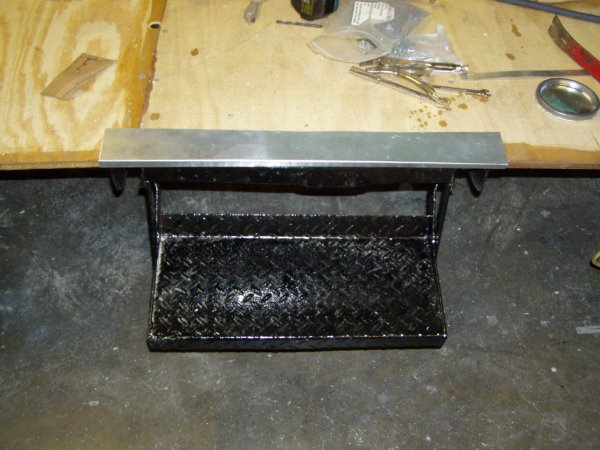
#32 - The Damn Step
The RV step is a deceptively complicated object. Besides tread style, and width, depth and drop dimensions, steps vary based on the way they latch closed and the way they mount. For instance, vintage Airstream steps use cut outs in the outriggers as tracks. Newer versions come with their own tracks on the sides.
#1 didn't come with an original step. It was an older replacement model. Colin and I have been arguing about that damn step since I bought #1. He pushed me to look for an original. I said I didn't care how it looked and a new one is cheap...a lot cheaper than having him fabricate something. I have to be cost-conscious someplace and a non-original step seems like a good place.
But Colin is a perfectionist and he had installed enough old and new steps to argue that a properly restored vintage Airstream step not only looks unique but also works better than a new replacement.
Ultimately, the argument ended when my #2 Caravanner showed up with a good original step. It has been cut out of #2 and made to fit just like it should on the #1 chassis. Colin wins.
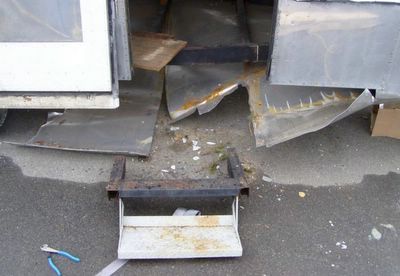
Original Step Cut from #2
 Step from #2 Restored and Installed on #1.
November 10, 2006
#31 - A Gold Mine!
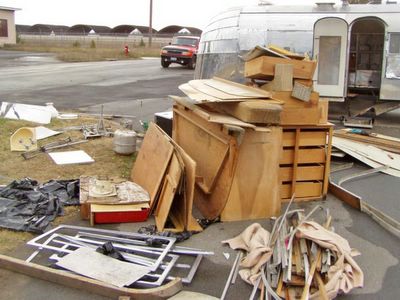
As I had hoped, inside #2 is a gold mine of parts. Until now, I didn't know for sure because the previous owner had gutted the interior while they started the renovation. They threw it all back in loose when we picked it up. They promised it would be nearly complete, but I didn't believe it until it all came pouring out on the pavement when we got it back.
Inside were great original appliances, most of the original cabinets (stripped and sanded but not refinished), nearly all the window parts, original hubcaps, and more.
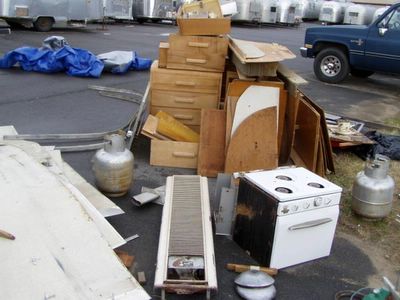
The propane fridge in the photo below is my favorite thing in the whole batch. It's an early Dometic gas-only fridge. The standard fridge in 1956 would have been a 110vac-only Marvel. Marvels are great looking fridges, but you have your fridge only when you are plugged in. Modern fridges go both ways, but they require a constant parasitic 12vdc draw on your battery to power the controls.
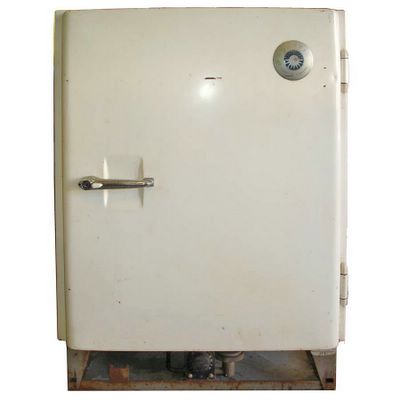
A Rare Original 1956 Dometic
Inside were great original appliances, most of the original cabinets (stripped and sanded but not refinished), nearly all the window parts, original hubcaps, and more.


The propane fridge in the photo below is my favorite thing in the whole batch. It's an early Dometic gas-only fridge. The standard fridge in 1956 would have been a 110vac-only Marvel. Marvels are great looking fridges, but you have your fridge only when you are plugged in. Modern fridges go both ways, but they require a constant parasitic 12vdc draw on your battery to power the controls.

A Rare Original 1956 Dometic
Subscribe to:
Posts (Atom)
